
For the basics about Themes, see Add and Configure Themes
Rather than reinvent the wheel here, we encourage you to review Theme Standards set forth by the folks at Wordpress. Wordpress Themes are almost identical in concept to Ushahidi Themes. Therefore, the Wordpress Theme Standards can apply Ushahidi Themes as well. In short: when development themes, please write clean, well-documented code & use valid css.
“Basic” Directory Structure: This is the directory structure you will see if a theme only deals with the look and feel of a deployment.
“Advanced” Directory Structure: If a theme not only changes the look and feel but also changes the layout, you will see one additional folder
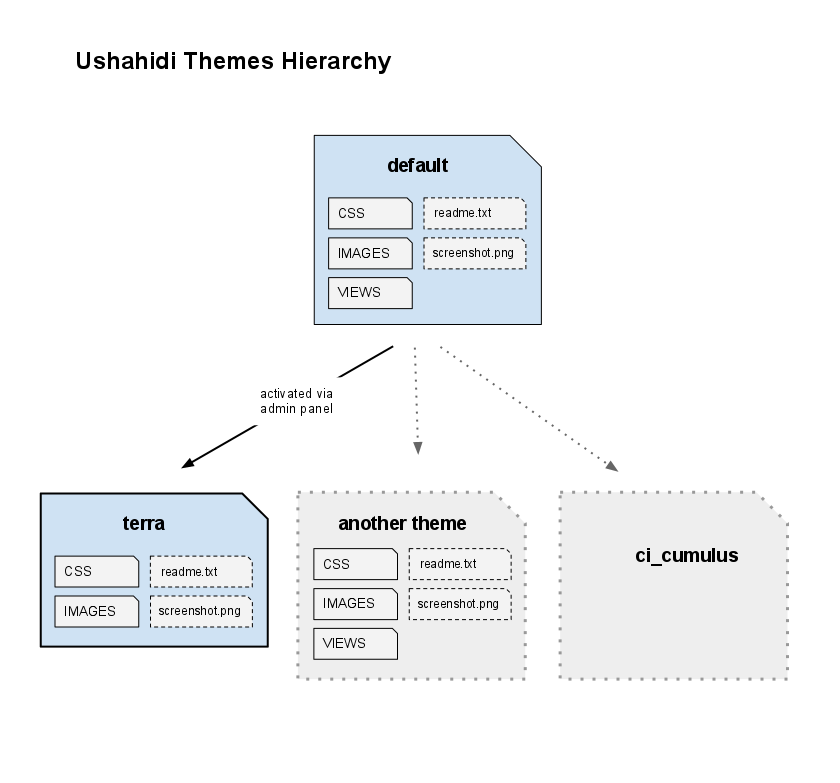
In order to understand how themes work, let’s first look at what is inside the “themes” folder on a clean installation of the platform:
Think of this folder as the “master” theme that governs all front end pages of the Ushahidi platform. This folder contains all of the default css, images and views that are used to render the pages. See this diagram for a visual illustration of this concept. This folder should always remain untouched when developing your own theme.
“terra” is the a theme that comes packaged with the Ushahidi platform. Notice that this folder only has a “css” and “images” folder. When this theme is activated in the admin panel, the css styles and images in the theme will override any css styles and images in the “default” theme. To take things further, if the “terra” theme also contained a “views” folder, those views would also override any corresponding views in the “default” theme.
In summary, the “default” theme folder holds all the default css, images, and views. Any other theme folder merely builds upon and/or overrides those css, images and views.
What follows are basic instructions for creating a theme that changes the default look and feel. This tutorial will assume that you’re working with a fresh install of the ushahidi platform.
1. Duplicate the “terra” folder and rename it.
Note: we’re just duplicating an existing theme because it’s quick and easy to do. In theory, you could just as well create a folder, and then add all the essential files and folders yourself and get the same result.
2. Edit “readme.txt” and fill it in with your details:
Theme Name: Flying Nyan Cats Description: A nice background pattern with a color scheme to match Demo: http://your-demo-site.com Version: 1.0 Author: Your Name Author Email: your@email.com |
3. Go to the theme management page in the admin area (http://your-deployment.com/admin/addons/themes). You’ll see that the Ushahidi platform has added your newly created platform to the list. Once there, click the “select theme” radio button to activate your new theme.
4. Go to the home page of our installation and refresh your browser. You’ll notice that default “grey” background has now been replaced with a “dark blue” blue one. This confirms that our newly created theme is indeed active. We are now ready to dive into the code!!
Now that we have our theme activated, we can now make changes and additions to the css and images that will change the default look and feel. If you want to modify the default look & feel at a basic level, you really just need to modify the css and images. The quickest way to get started with this is to use Firefox to view the pages of your deployment and then visually explore the html/css structure using the Firebug Addon (cheesy but helpful tutorial on how to do this). Once you know what sections of html/css you need to change, you’ll be able to easly modify and update your theme’s “styles.css” file accordingly.
As mentioned earlier, “views” are the files that contain all the information you want to output to the browser. As such, we can use them in our theme to change the default layout and elements that are displayed on our pages. To make a change to the layout of a pages, you must take these two steps: