This team will be in charge of taking reports classified as 'to be geolocated' and geo-tagging them as accurately as possible.
Before you start:
Review the Uchaguzi Participant Checklist & Guide
Your coleads are Ben (Local), Rob and Brendan (Global)
Instructions
1. Please log into Skype.
Log in to the Skype Window of the Geolocation Team and announce you are starting your shift. If you are not already added to skype chat, please contact your Team Coleads for assistance.
You will be added to skype groups only after you have completed training. For more about using Skype: See the Uchaguzi Skype workflow.
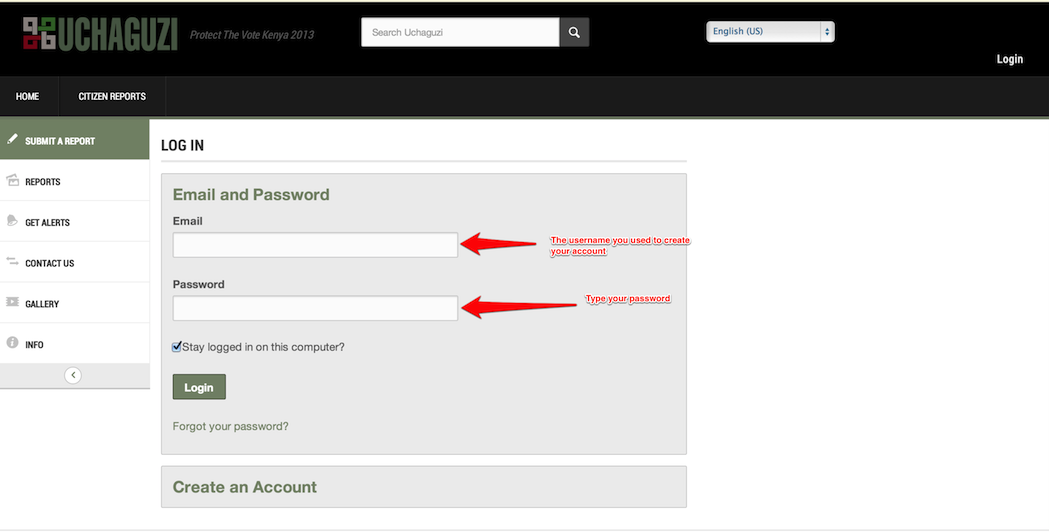
2. Log into the Uchaguzi platform here.
When you confirmed your participation, we encouraged you to set up your account on uchaguzi.co.ke. We then upgraded your account to your respective member role. If you did not create your account in advance, please go ahead and create your account, then advise your colead so that you may be granted access as per the Uchaguzi Access Chart.
3. Click on the Reports tab in the Administration Dashboard.

4. Click on "Reports To Be Geolocated"

5. Review Reports
Prioritize reports that have been categorised as “Security issues”, “Dangerous speech” and “Police Actions”
Remember to refresh the page often to see the most recent events.
6. Check with your team
Choose a report and make sure it is not being processed by someone else on the team by sharing the report ID (last two - four digits at the end of the URL) or full report link with the rest of your team in the skype window.
6bis. For reports arriving in system with number codes from trusted monitors
If these have geolocation information, fine - proceed to next step. But if there is no attached geolocatable information, then leave these checked as 'To be geolocated'. DO NOT check 'impossible to geolocate' - they will be processed automatically by the system later.
6Ω. For reports generated by SMS - using 'Show messages' to get more location information
If the report you are working on has originated via SMS, then you will see a clickable 'Show messages' link above and to the left of the map. In quite a few cases the content of the report we receive will contain no geo-locatable information in the title or description fields...but if you click on 'show messages' you will be able to see the full thread of messages - and quite often the SMS team will have responded to the original SMS seeking additional information about location - which, hopefully, will then be contained within the messages thread you reveal."
Very occasionally we will receive SMS-generated reports without a location - we can either send these back to the SMS team (if you're not in that team's chat window, flag up and a co-lead will send back, or if none is present, flag in general chat).
However, we can also get the information ourselves by following the procedure outlined below. If unsure about any of this - DO NOT hesitate to ask a co-lead or experienced fellow volunteer.
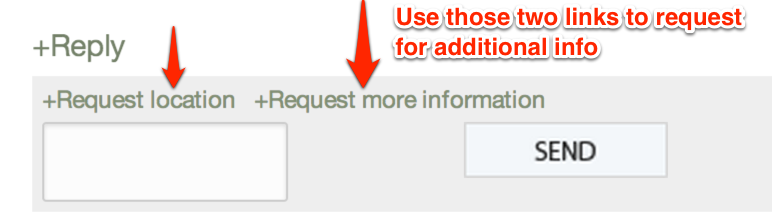
- In the event that a location is not specified, click on REPLY and request for location information from the sender.
- In the event that more information is required, beyond the content of the SMS, go back to the SMS message page, click on REPLY and request further information from the sender.
NB: If you have requested additional (location or detailed) information, note down the ID of this message, keep this message open on another tab, and refresh every five minutes to check for responses (which you will find by clicking on the Show Messages button.)
7. Geo-hunt for the Coordinates
Start looking for grid coordinates of the specific location provided in the report. You can do this in the following ways:
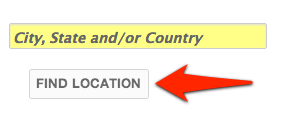
a. Use the Find Location tab under the Map
If there is an address provided OR a specific name of a city/village or place in the report location field, COPY and PASTE it into the Find Location field under the map, and click on find location. Once the Red Pin has moved into location, zoom in to confirm that the location pin pointed is the correct location corresponding to the one provided in the report
b. Research locations
All the counties and polling stations are loaded into Uchaguzi as layers. Uchaguzi geo-volunteers are encouraged to review the master Kenya Geo Google Doc ( this spreadsheet). It includes all of the grid coordinates which have already been recorded. Polling station lats and longs are on the polling stations reference doc.
c. Other Mapping Resources
If the location you are looking for is not in the grid coordinates list provided, start looking for map coordinates using the following mapping tools listed here. We have found that OSM, Wikimapia, Google Earth and Google Search have been the most effective tools for finding locations.
Once you find the right coordinates, add them to the spreadsheet
If you find additional mapping tools, add them to our list of geo resources
The hardest part is finding the exact location and pinpoint as precisely as possible (might require some Google and OSM searching on your part). Once grid coordinates are found, insert them into the dedicated latitude and longitude fields on the top right hand corner(right above the map) of your reports page.
Make sure the location name field has the precise location provided.
If unsure about accuracy of your coordinates, PLEASE INDICATE this in the location name field by adding any additional comments about the location
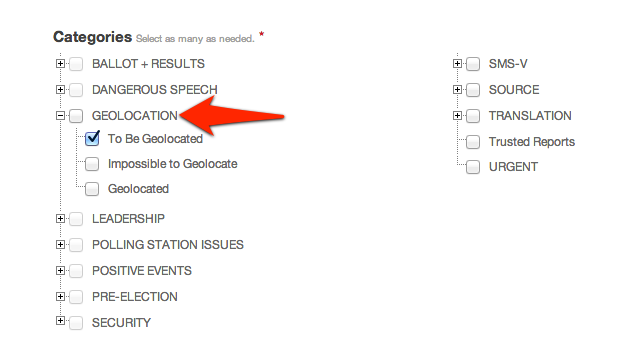
8. Very Important! In Categories under actionable box - Deselect "To be Geolocated" and select either "Geo-located" or "Impossible to geolocate"
Once you are done, deselect the “To be geolocated” category, and select the “Geo-located” category, unless you cannot find any grid coordinates, in which case you should select the category “impossible to fgeolocate”. Please remember that 'to be geolocated' does not deselect itself when you tick one of the other two options - you must do it manually! You do NOT need to tick the box to the left of "GEOLOCATION" - please leave this empty.
9. New step - Check the translation boxes (right hand side of Categories area)
If the report is in English already, then make sure you check the 'no need to translate' box. If it has already been translated, then check this ('translated') box. However, if either the the title or, especially, the main report text have not yet been translated - check the 'To be translated' box. This is VERY IMPORTANT - the Translation team, like us, is working under great pressure - and we should not be wasting their time by sending them reports to open, which they do not need to see! Many reports we receive have no ticks in the Translation boxes - so we have to choose one of these options. Time is of the essence - but not just Geolocation Teams's - everybody's!
10. Save and Close
(if you have geolocation permission only, you should not be able to change the approved or verified status of reports...if somehow you have wider permission to amend reports because of belonging to another team as well, please DO NOT change this status when working in Geolocation)