IMPORTANT:
In order to make it easier for the user of this guide I am using the following symbols to identify different types of text.
1. Instructions of new steps
♣ CODE - be careful when you copy and paste and remember it's case insensitive.
• Steps within a step and additional explanation.
Step 1: Creating an EC2 account
First things first: you need to create your AWS account. You can sign up here. You’ll have to provide a credit card as part of the online registration process. Amazon offers a Free Usage Tier, which is great to explore the services and even host USHAHIDI at low traffic without being charged. Check the details here and here for specific information on AWS free usage tier.
Step 2:Launching an EC2 instance
You can start your experiments with a Micro instance because its price structure is very attractive. Meaning its free for the first year However, once your instance gets a few thousand page views a day, your instance will systematically become unresponsive and you will need to restart Apache and/or MySQL. If you expect to receive major traffic to your site you can choose to deploy on a variety of servers from a small instance to an extra large instance.
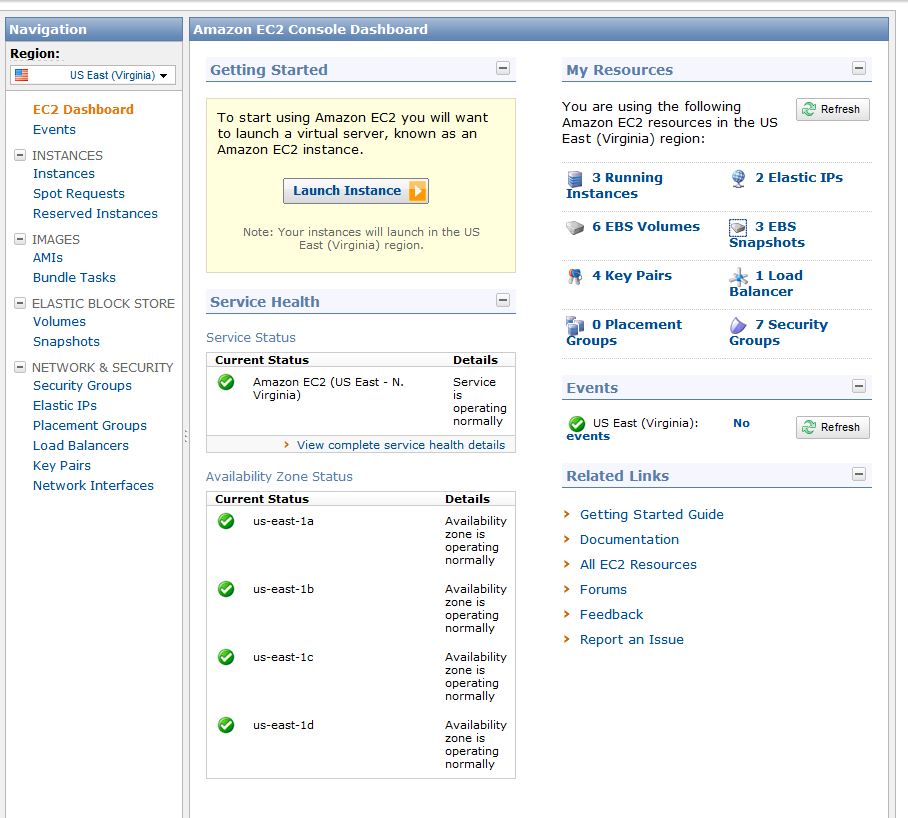
To create a new instance, access the AWS Management Console and click the EC2 tab:
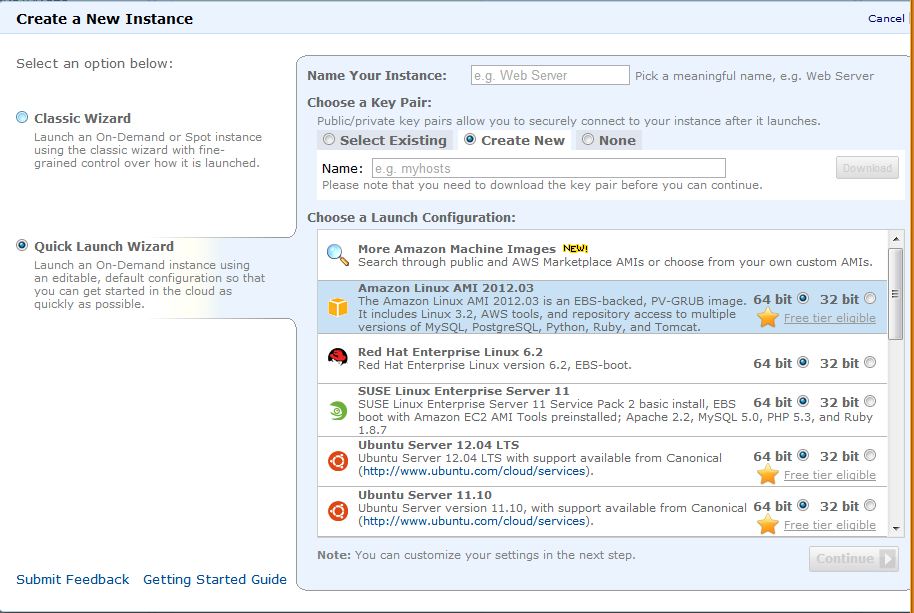
- Choose an AMI in from the Quick Launch Wizard: This tutorial will demonstararte a deployment using Ubuntu Server 12.04 LTS - 64 bit.
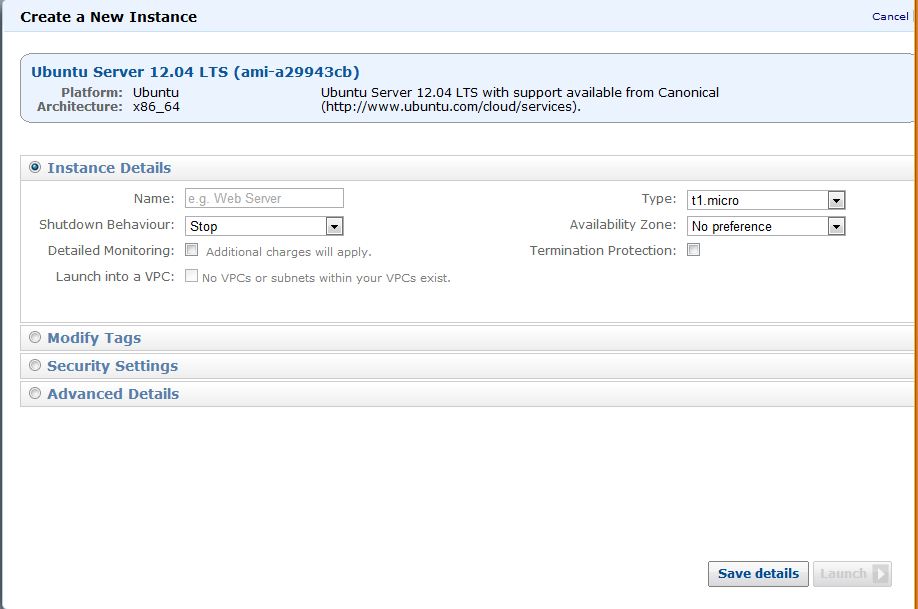
- Click on Edit details: Select the Instance Type you want to use. We will chose Micro (t1.micro). You can give your instance a name and determine the shut down behavior.
- Create a new key pair. Enter a name for your key pair (i.e. Tufts) and download your key pair (i.e. Tufts.pem).
- Select the quick start security group.
Step 3:Allocating an elastic IP
On the left side of your screen you can see a column titled Navigation. Under Network and Security, select Elastic IPs. Under Address click on Allocate New Address and select EIP used in: EC2
After the IP is allocated, right click on the IP and select Associate and select the instance.

Step 4:Installing Ushahidi
Once your instance is running, you can access it using SSH. Secure Shell (SSH) is a network protocol for secure data communication, remote shell services or command execution and other secure network services between two networked computers that it connects via a secure channel over an insecure network. This is a bit more technical but take a deep breath and you will have an instance running sooner that what you imagined.
To launch your SSH – right click on your instance and click connect
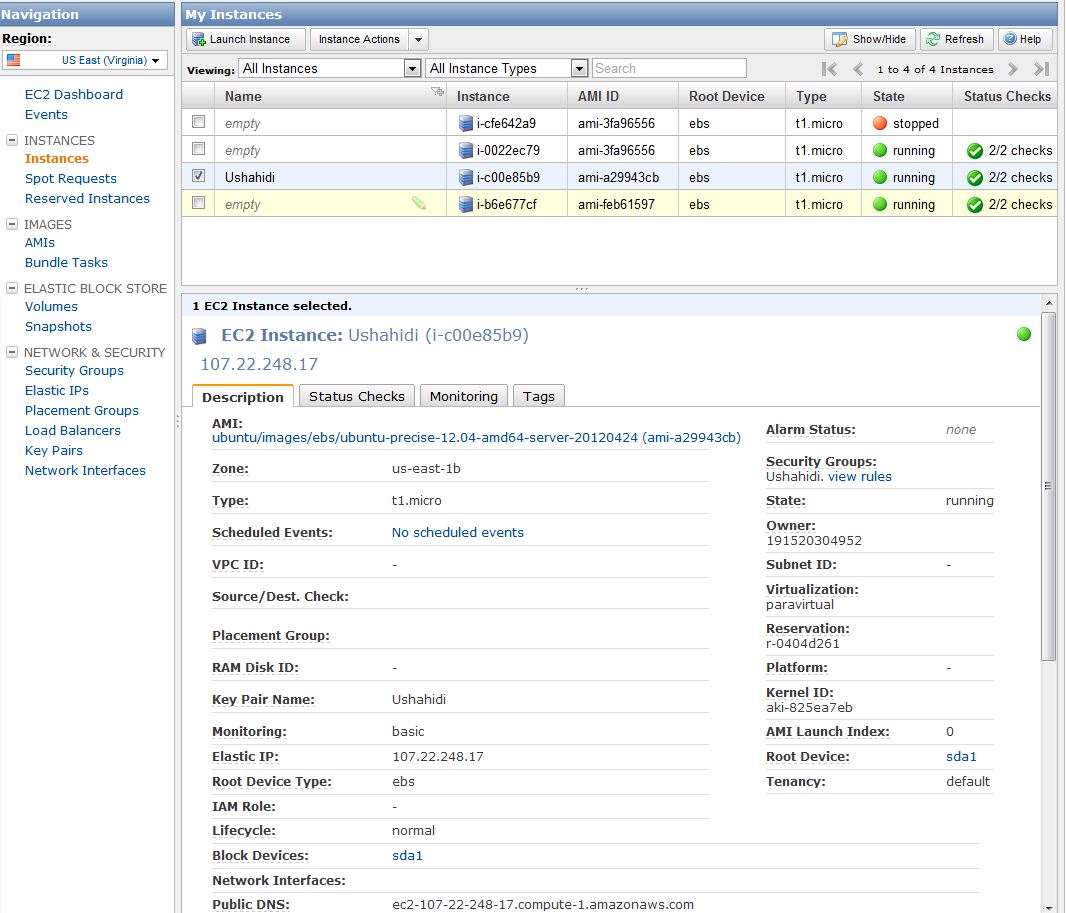
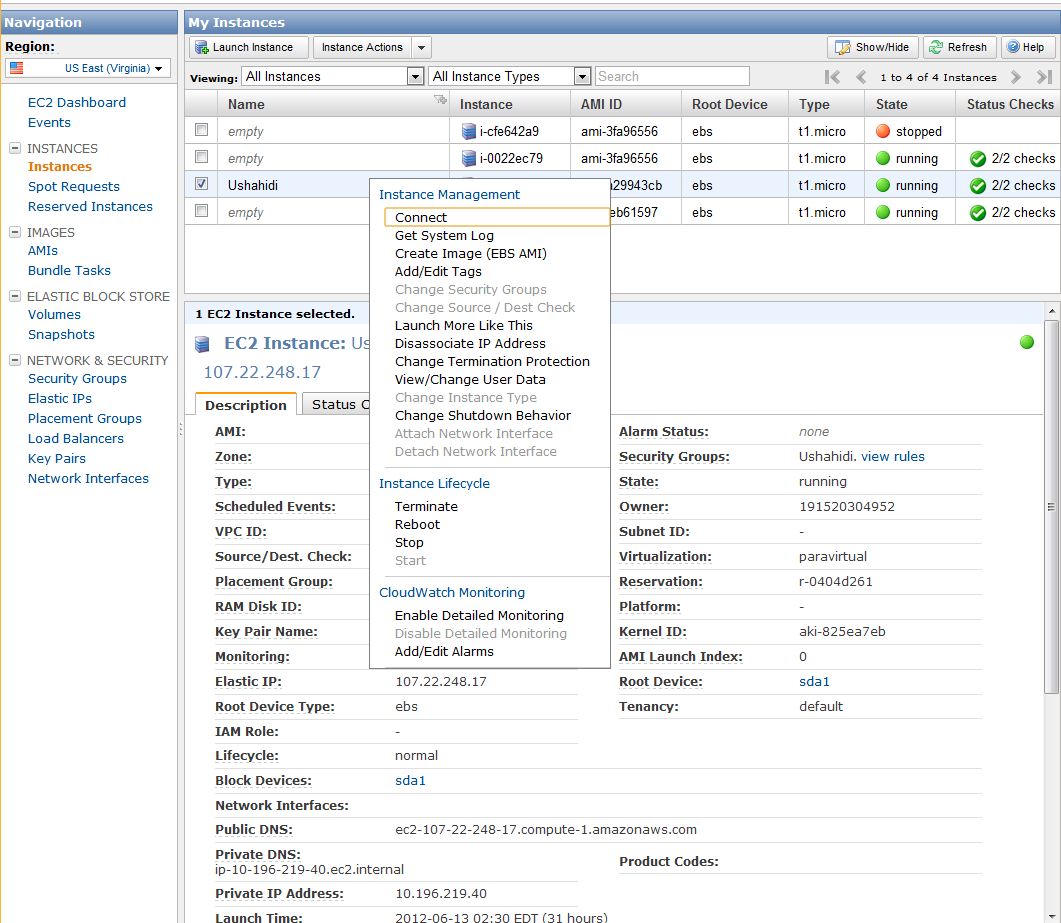
Once you have created a new instance, the instance will appear under "my instances".
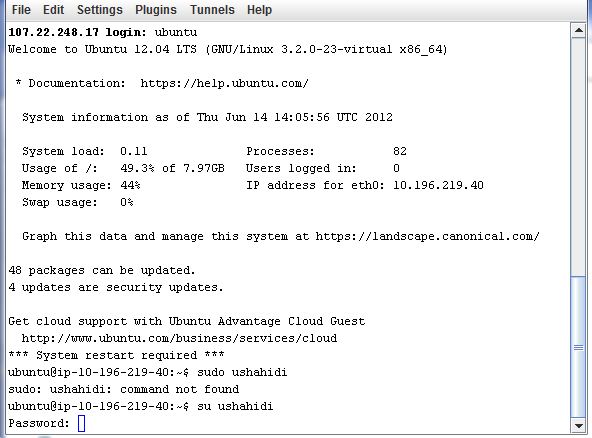
This is the SSH connection. You first need to log on as "Ubuntu" and later create the root sure and password. By following the instructions.
Congratulations, now that you're logged in to your server via SSH you will need to follow the following steps carefully. I can assure you it simpler than what it looks. Good luck!
- Creating a root user
Although, the root user is already created, root login is disabled in sshd config. To enable root login follow the following steps.- Log in as Ubuntu.
- Switch to root using command: sudo su -
- Set root password with command:
passwd - Now in order to edit sshd_config you need to edit the following file
/etc/ssh/sshd_config
nano /etc/ssh/sshd_configorvi /etc/ssh/sshd_config
Scroll and change the following values: - PermitRootLogin no >> PermitRootLogin yes
- PasswordAuthentication no >> PasswordAuthentication yes
Save
/etc/ssh/sshd_configand restart ssh server with command:
That’s it! You can access the server with your SSH client and password that you just set.
Step 5: Installing required software:
Run each of these commands separately, it might take some time and require a “Y” once in a while.
Step 6: Installing Ushahidi
Create new user and set password
Login as user and create dir for web files. To switch from root to user use commands below (alternatively you can start new SSH session)
Download the latest version of Ushahidi from https://github.com/ushahidi/Ushahidi_Web/archives/master using the following command:
Unpack files into
/home/ushahidi/public_html/ushahidi-webChange directory to
/home/ushahidi/public_html/ushahidi-webChange permissions for files
Creating a database:
NOTE You need to execute command above and enter root password for MySQL (
mysql -u root -p), you will enter mysql console where you can run commandcreate database ushahidi_web;to create database.
In the same mysql command line interface you need to run command below to grant permissions for mysql user:Updating apache config to make Ushahidi-web our default web server. In this step you are going into 000-default and replacing the existing with the following. First access the file by writing the following command:
Then paste in the text below, beginning with
<VirtualHost *:80>and ending</VirtualHost>.To exit and save you need to use the Ctrol buton in combination with the upper case X. They click Y to save.
- Restart Apache:
The good news is that you are almost done!