Reports Team Instructions
Before you start:
Review the Uchaguzi Participant Checklist & Guide
Your coleads are Anne (Local), Jus (global) and Heatherleson (global)
REMEMBER THAT YOU ARE THE LAST PERSON TO SEE AND EDIT THE REPORTS BEFORE THEY ARE LIVE ON THE MAP.
IF YOU HAVE ANY DOUBTS, CONCERNS OR ANY ISSUE RELATED TO A REPORT, ASK TO YOUR COORDINATORS, OR YOUR TEAM ON THE SKYPE CHAT.
1. Please log into Skype.
Login into the Skype Window of the Reports Team and announce you are starting your shift. If you are not already added to skype chat, please contact your Team Coleads for assistance.
You will be added to skype groups only after you have completed training. For more about using Skype: See the Uchaguzi Skype workflow.
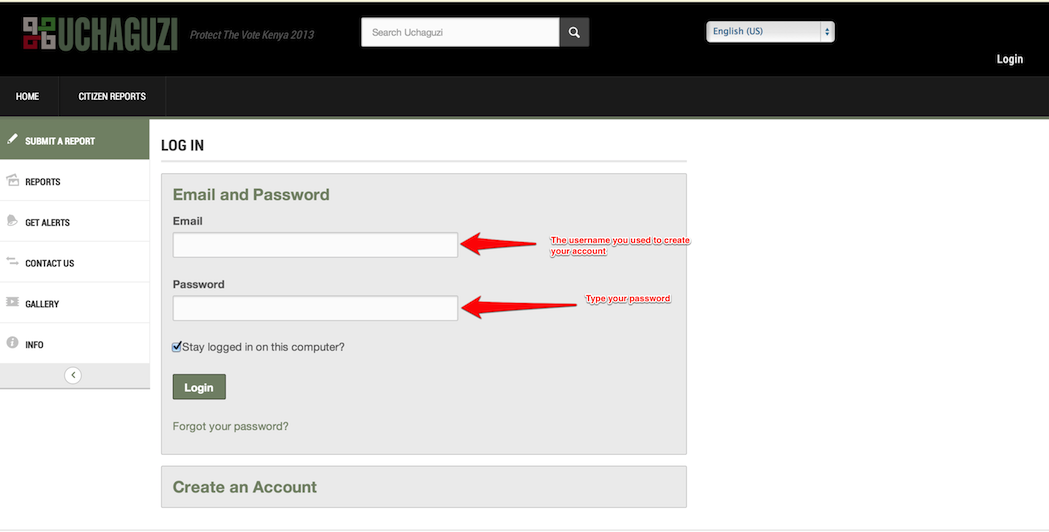
2. Log into the Uchaguzi platform here.
When you confirmed your participation, we encouraged you to set up your account on uchaguzi.co.ke. We then upgraded your account to your respective member role. If you did not create your account in advance, please go ahead and create your account, then advise your colead so that you may be granted access as per the Uchaguzi Access Chart.
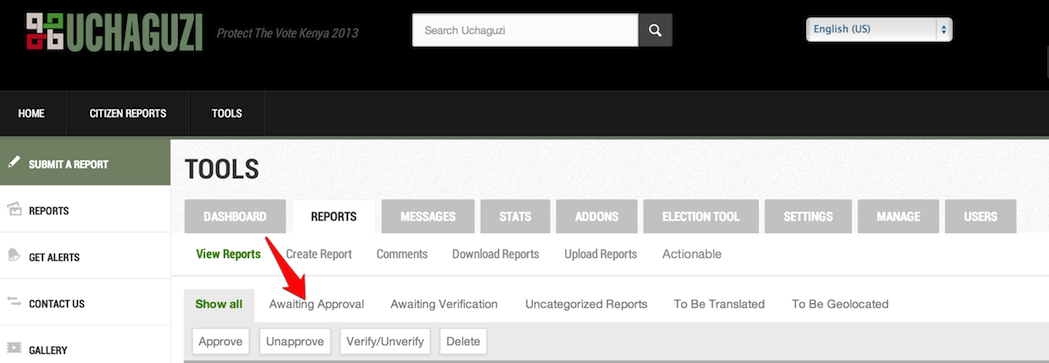
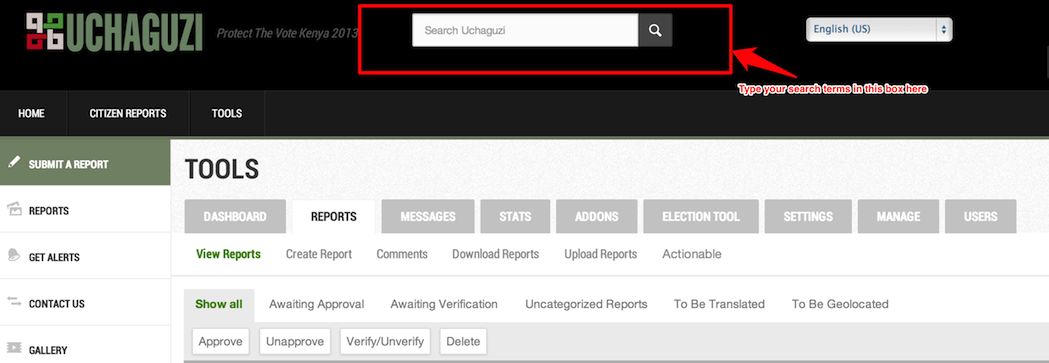
3. Click on the "Reports" tab under the "Tools" tab.

4. Click on "Reports Awaiting Approval."
The next steps are very important. Please review the Uchaguzi Reports Overview for more context on why these steps matter.
5. Before you touch any reports, check with your co-mappers via skype for a status update on urgent updates, key report notes and coordination tasks related to all things "Reports".
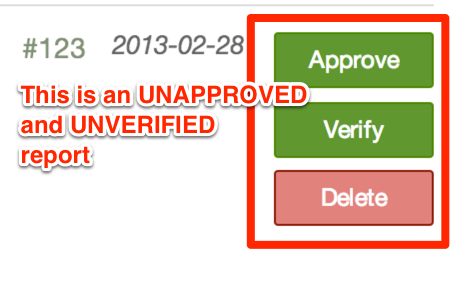
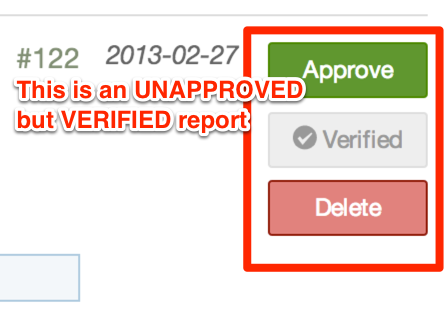
6. Review the most recent reports, and look for reports that have been marked as VERIFIED.
(These include messaged that are from our trusted responders on the ground and those verified by the verification team)
Prioritize reports that have been flagged as “Security Issues”, “Police Actions” and “Dangerous speech”.) Remember to refresh the page often to see the most recent events
7. Choose a report that has these AT LEAST two of these categories marked: “Geolocated” & “Translated” OR “Translation not needed”.
DO NOT PROCESS any report that does not have at least two of these categories marked. In your "Reports team" skype window, check for report URL or report ID (the number at the end of the URL of your report). cited by colleagues. This ensures that the report you picked is not being processed by anyone else on your team.

6. Search the Uchaguzi platform for similar reports by using the search bar at the top. Things you should search for include:
To search for similar reports, use the location name, or event type e.g if you are processing a report saying “Polling station #37 is closed”, search for Nairobi, or “closed”
If you find a similar report, check to see if the report is exactly the same or not
- If it is exactly the same, copy and paste the most recent report’s description into the older report, and delete the recent one. Make sure you also transfer any pictures, video links or news links contained in the report you are deleting.
- If the reports are very similar, and look like they could both be referring to the same event reported from different angles, simply append a link to the similar report with the words “Similar Report” preceeding. Make sure the “Verify this Report” field is set to NO. The verification team determine if the similar reports are reporting the same issues
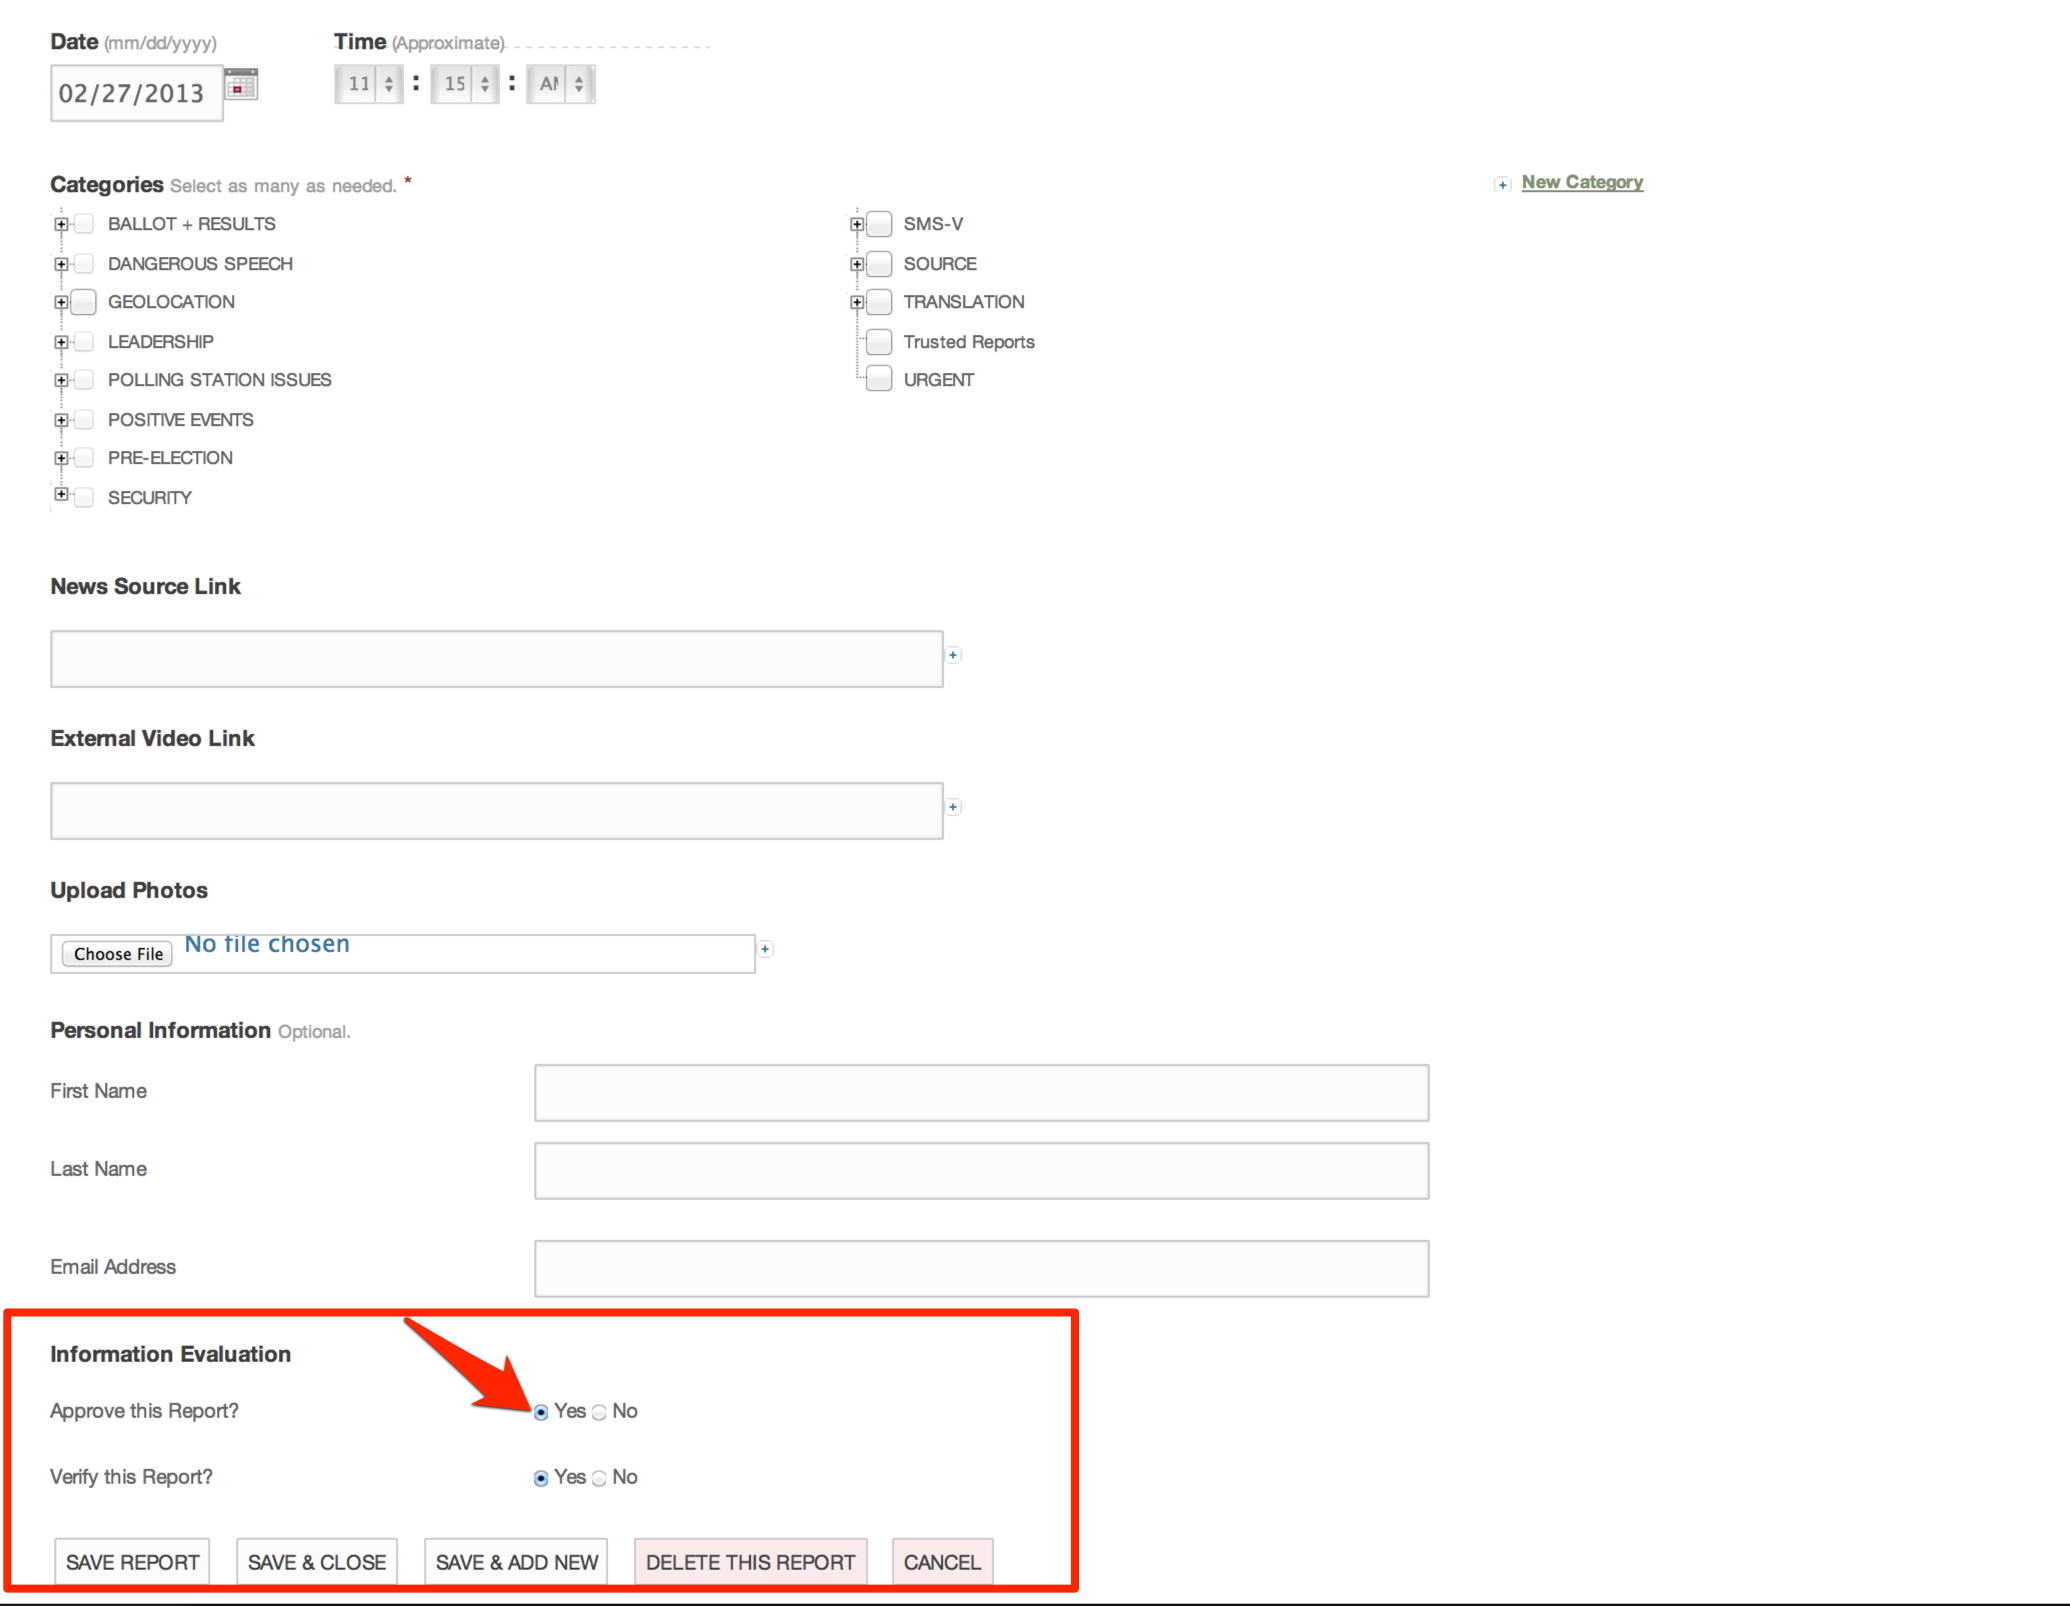
If there are no similar reports, confirm that appropriate categories have been checked for this report. Category descriptions can be found here.
- If there are too many/any irrelevant categories checked, deselect those that don’t fit. Its better to have fewer precise categories than too many inaccurate categories
- If there are categories that have not been selected, yet you think are appropriate for this report, please select them.
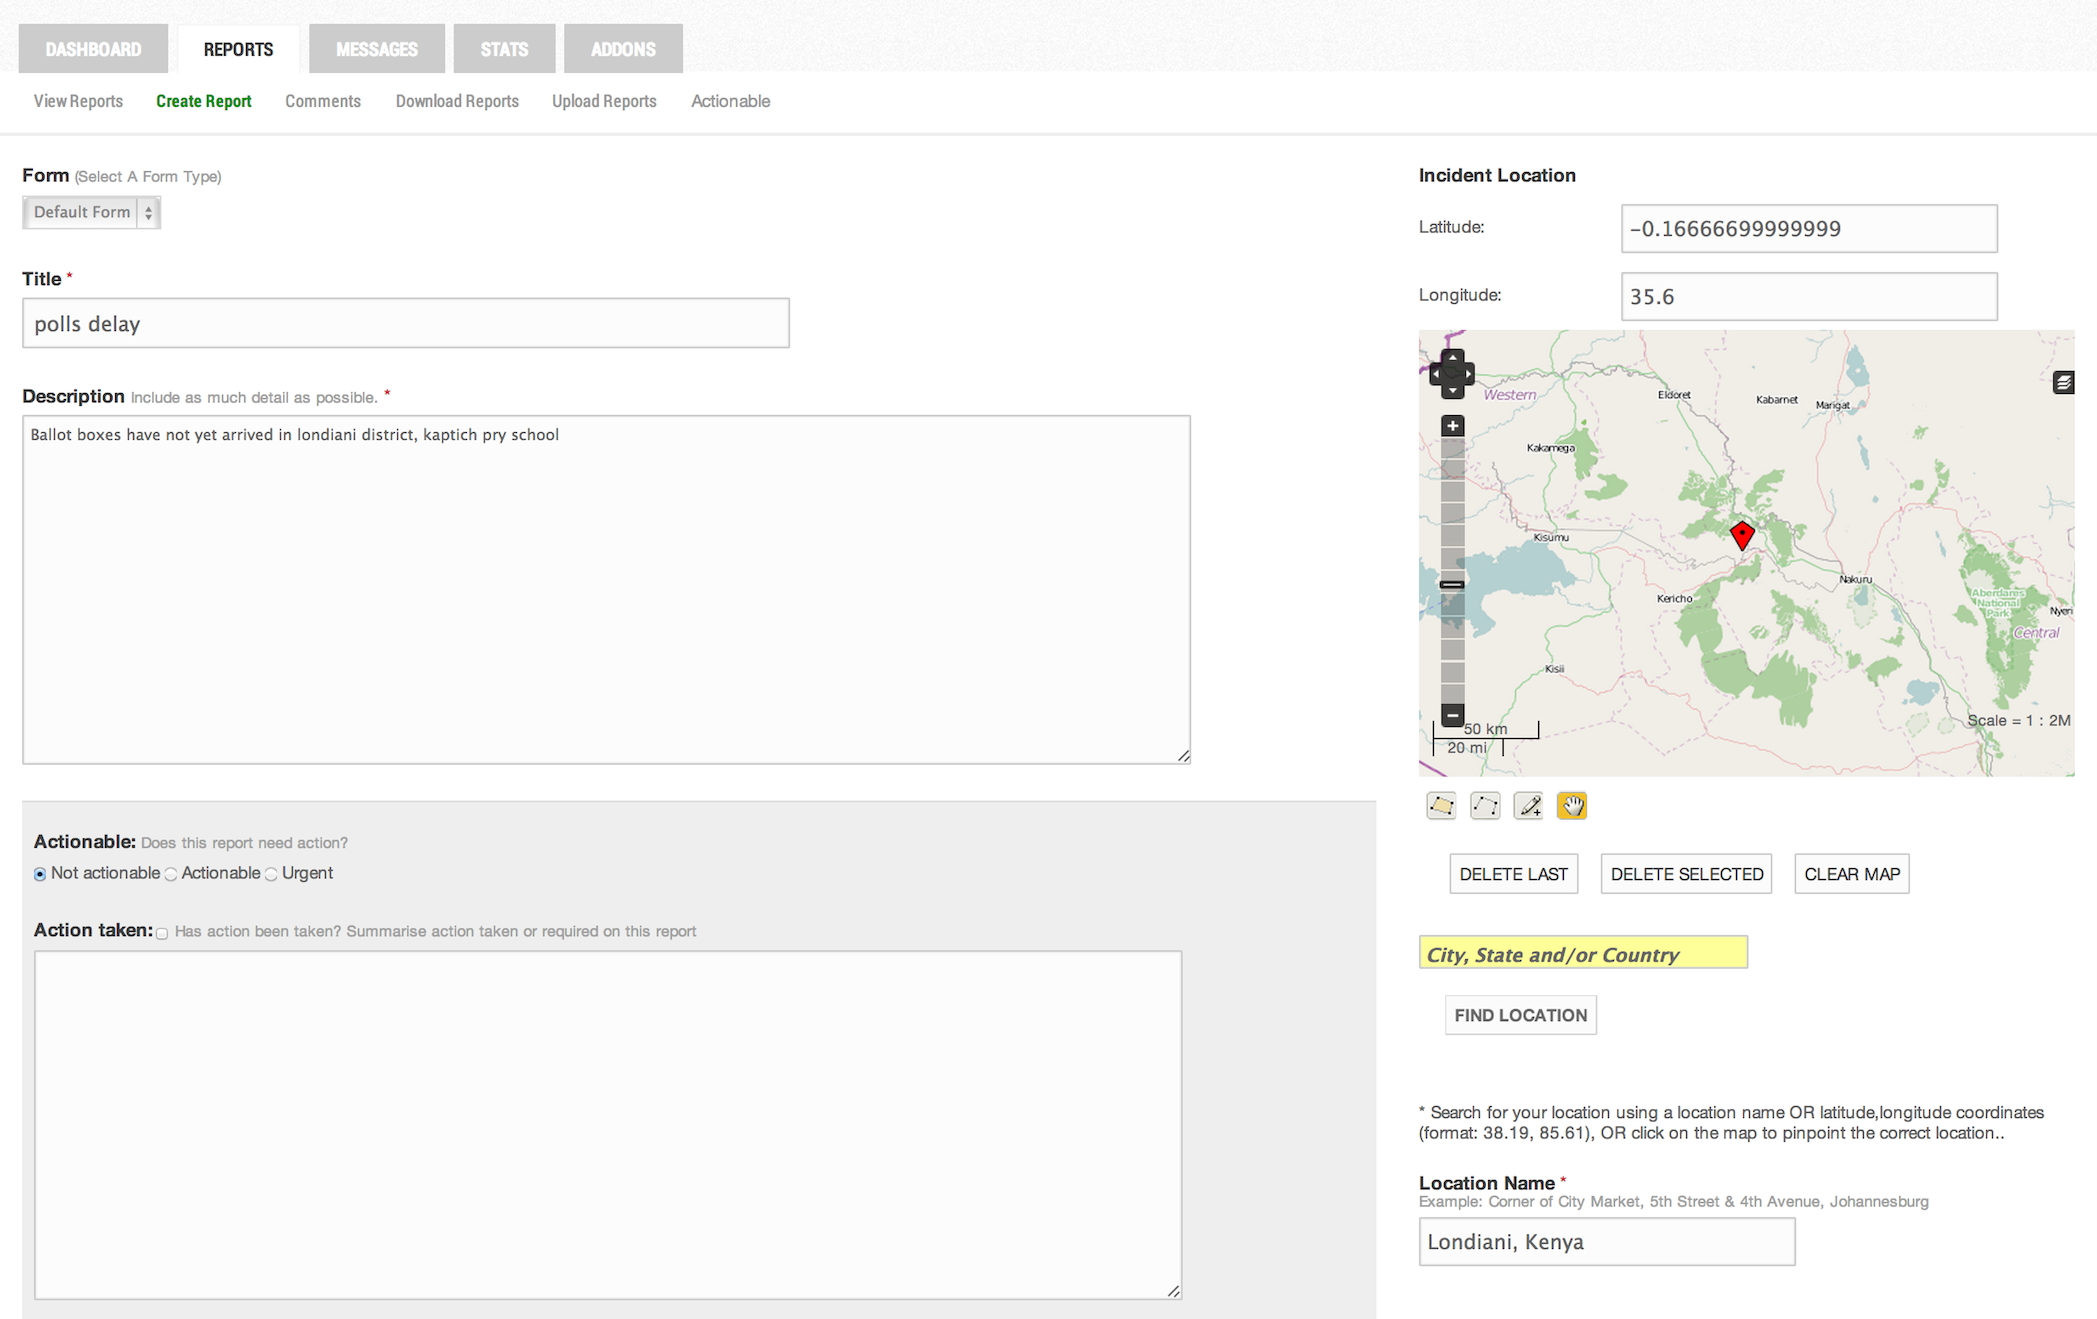
Check whether the appropriate location has been chosen.
- Go to the map section of the report and zoom in. Make sure the location where the red marker on the map appears is the same one written in the “Refine Location Name”
- If the location is inaccurate, uncheck the “Geolocated” category and select the “To be Geolocated category”. Note the ID of the report, and forward to the Geolocation team to check and fix.
Finally, review the entire report one last time by looking over it.
- Make sure links are provided, if needed
- Ensure no personal information is provided in report descriptions/titles
- Ensure the location on the map matches the address provided
- Ensure all appropriate categories have been selected